If you’ve made it this far, you’re doing great! Today we’re going to look at how to make your FastPass+ Reservations for your trip. In another post I’ve got a list of all of the attractions in Disney World where FastPass+ is a must. There are numerous attractions, especially in the Magic Kingdom, where FastPass+ is offered but definitely isn’t necessary. Until we know for sure that you can make additional FP+ reservations after you use your first three and until the lines at the in-park FastPass+ kiosks settle down, it’s is best to use your 3 allotted FP+ reservations for attractions that are high on the priority list. So be sure to look through this list before you make your plans.
So let’s get started!
Step 1:
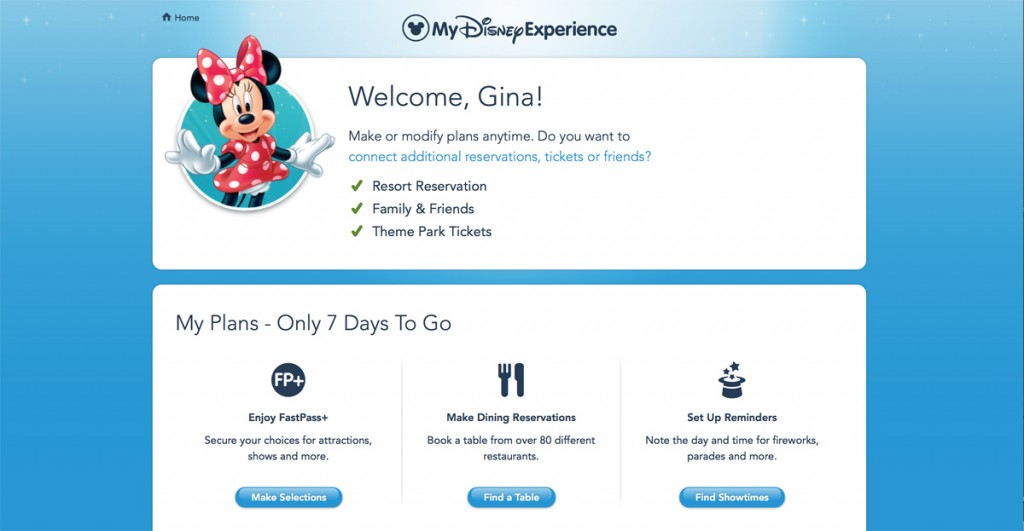
Log in to your My Disney Experience account. Doing so will bring you to your main My Disney Experience planning page. This is what mine looks like:
Step 2:
Click on the ‘Make Selections’ button from the FP+ third of the My Plans menu. Clicking this button will take you to this page:

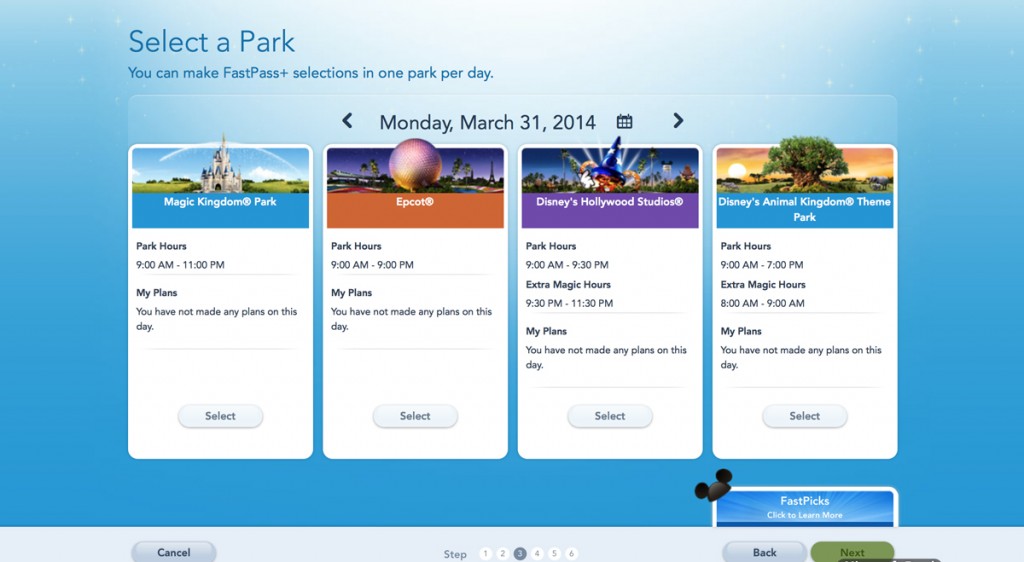
If your travel dates are not the ones that are showing you can use the arrows or the calendar to select the appropriate dates.
Click the ‘select’ button under the date on which you’d like to make your FP+ reservations. Then click next.
Step 3:
Now you will see a screen that lists the names of everyone on your reservation. Click the names of the people for whom you are making FP+ reservations and click next. Note: Not everyone in your travel party needs to have the same FP+ plans! You can totally customize your choices based on the different attractions everyone in your travel party wants to experience, so, for example, at Hollywood Studios teens can reserve Tower of Terror, Rock ‘n’ Roller Coaster, and Indiana Jones while Mom, Dad and younger kids can book Toy Story Mania, Disney Junior and Star Tours.

Step 4:
Next you will select the park where you’d like to reserve your FastPasses and click next.
Step 5:
On the ‘Add Attractions and Entertainment’ page you may choose three FastPass+ reservations. At Epcot and Hollywood Studios, attractions are sorted into two tiers. You may choose one Tier One attraction and two Tier Two attractions.
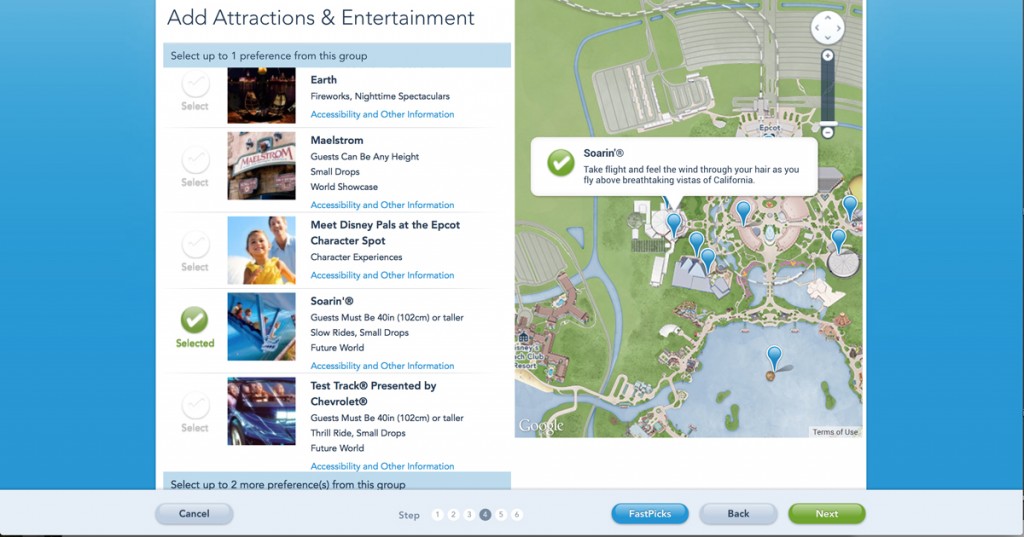
After you have made your three FP+ selections, click next.
Step 6:
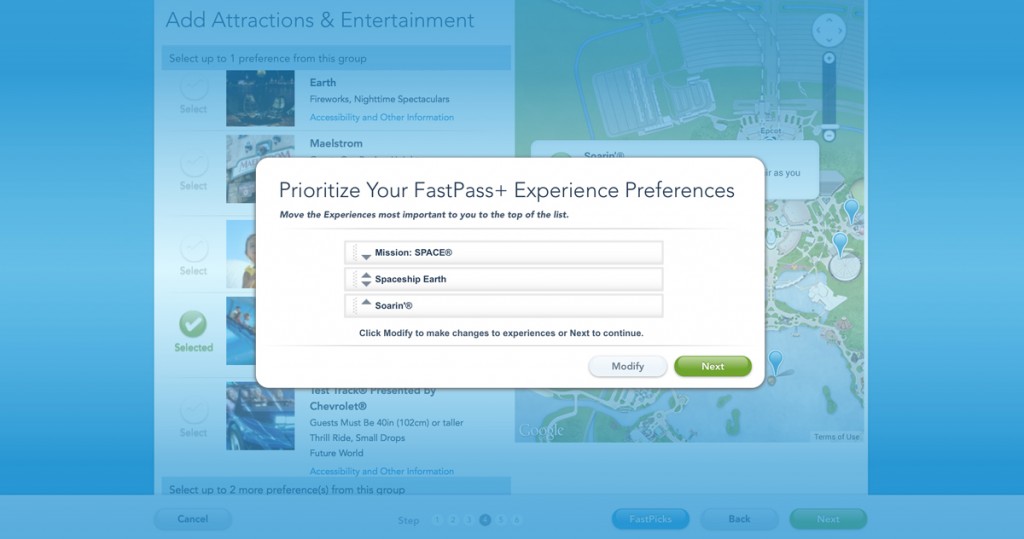
Disney gives you the option to prioritize your choices. You can drag the attractions up and down in the menu to arrange them in the order you’d like to experience them. You will also have the option later to completely change the reservation time for each attraction based on availability. After you’ve arranged your FP+ selections, click next.
Step 6:
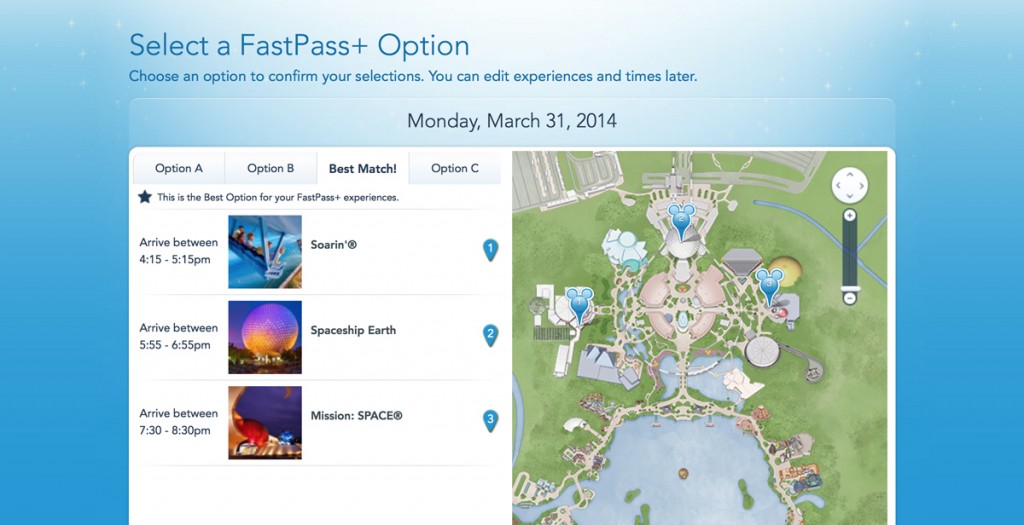
Here you will see that Disney has given you four options for your reservation times–their ‘Best Match’ times and three others (option A, B, or C). Choose the option that offers you times that are closest to the times you wish to ride and click next. Again, these times can be modified later. For this example, I’m going to click Option A, which gives me earlier times than Disney’s ‘Best Match’ times. You’ll see those times on the confirmation screen below.
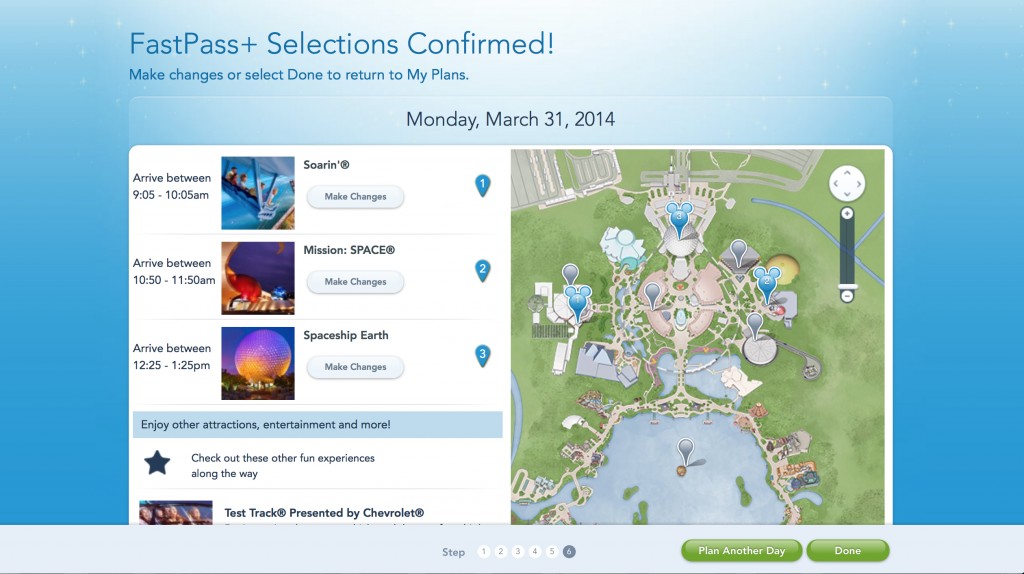
Disney will then confirm your selections and you’ll see ‘Make Changes’ buttons beside each attraction. If you are happy with the times you’ve been given, click either ‘plan another day’ to make more reservations or ‘done’ if you are finished.
Great! Hopefully that all worked out for you and you’ve got your first three FP+ selections reserved. Go on and make others if you wish. If you need to modify the ones you just made, keep reading! I’ll show you how to make changes to existing FP+ selections next.
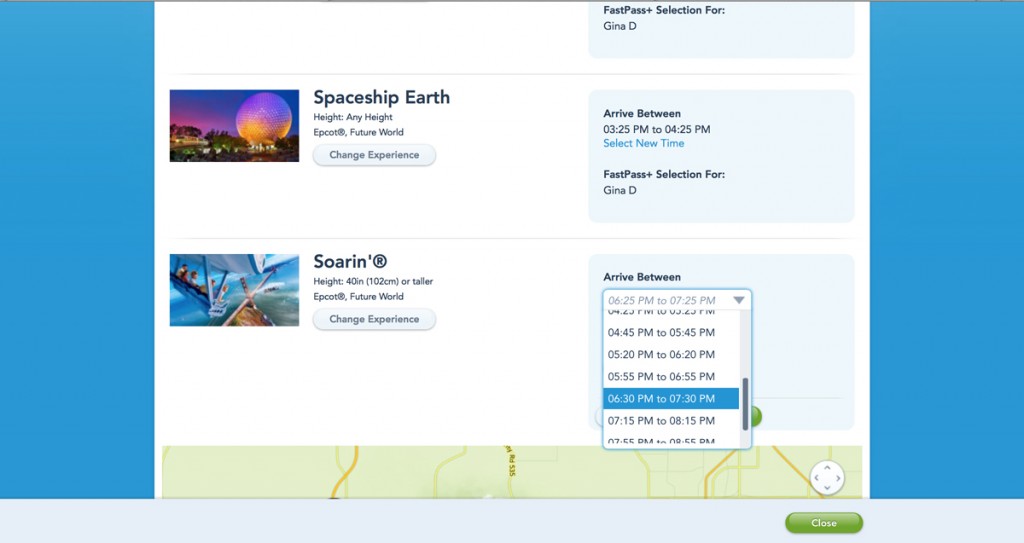
To Modify the Times of Your Selections
I do think that it would streamline things if Disney simply gave you a list of time options for each attraction as they are selected rather than giving you predetermined times that may not fit your schedule. This way you wouldn’t have to modify them at all as they’d be totally customized. Perhaps in the future this will be something the system allows. For now, we have to do it this way.
Click the ‘Make Changes’ button next to the first attraction you’d like to modify. In the right sidebar is a pull-down menu beneath the words ‘Arrive Between’ that list all of the return times available for that attraction. Select the time you’d prefer to experience the attraction and then click ‘Update.’ A green check mark will appear next to the attraction you modified confirming the change.
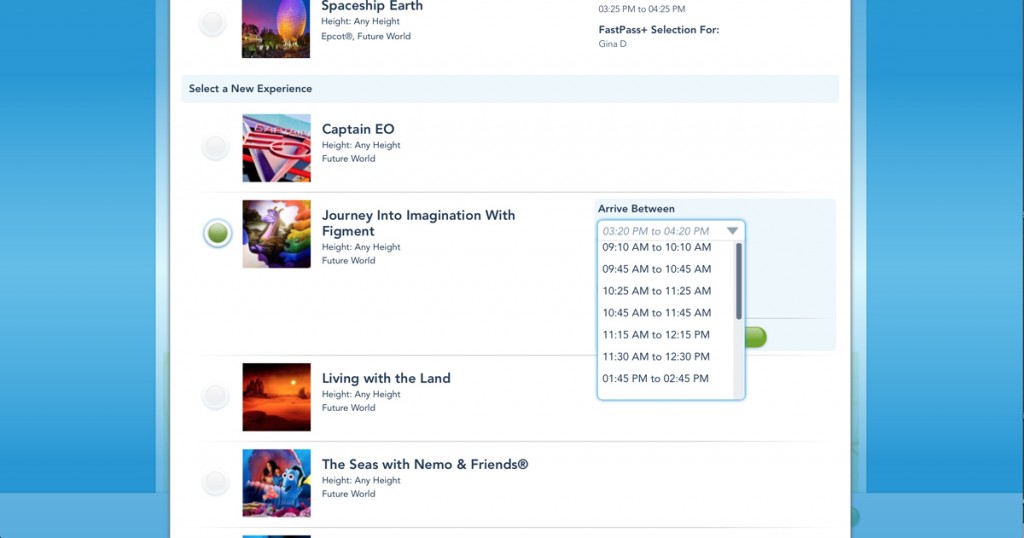
To Modify a Specific Attraction or Experience
You may make certain FP+ selections that you later decide you’d like to switch for others. This is easy to do as well.
Click on the ‘Change Experience’ button beneath the attraction name. A menu will pop up that offers you all of the attractions that are available at the same time as the original attraction. Choose the attraction you’d like as a replacement. At this point a little menu will pop up that will allow you to choose a new time for the replacement attraction as well. When you have chosen your new attraction and FP+ return time, click ‘Update.’ You can also click ‘Cancel’ to try a different replacement attraction.
If you follow these steps in the order I’ve listed them here, you should have no trouble choosing your FP+ selections. If you run into any trouble with anything along the way, don’t hesitate to post questions in the comments section below. I will be sure to get back to you and help you in any way I can! I’d love to hear about your experiences using My Magic+ so please share how the system worked for you in the comments as well.


Speak Your Mind